5 Hacks to Get the Best out of Airtable
In this post, we will be sharing five of our favourite tips and tricks to help demonstrate what's possible to get the best out of Airtable.
Learning new software can be overwhelming. With new features being released on our favourite tools, knowing new tips and tricks will help supercharge your workflow.

Airtable can connect with just about everything, which is great. Everyone is using it. However, while this is powerful, it can be a steep learning curve for new users and experts alike.
Airtable is a hybrid of a spreadsheet and relational database. As a spreadsheet, you can structure information in a table with a grid view, columns and rows. As a database, it allows you to link records to one another, and enable data entry, and formula calculations.
In this post, we will be sharing five of our favourite tips and tricks to help demonstrate what's possible to get the best out of Airtable.
1. Filter information with the right view type
One of Airtable's top features is that you can look at the same information in different ways.
When you add a new table to your base, the default view type is the grid view. Airtable also allows you to view the same data and information in other ways whether that’s as a form builder, calendar format, visual gallery, Kanban board, timeline, or Gantt views.
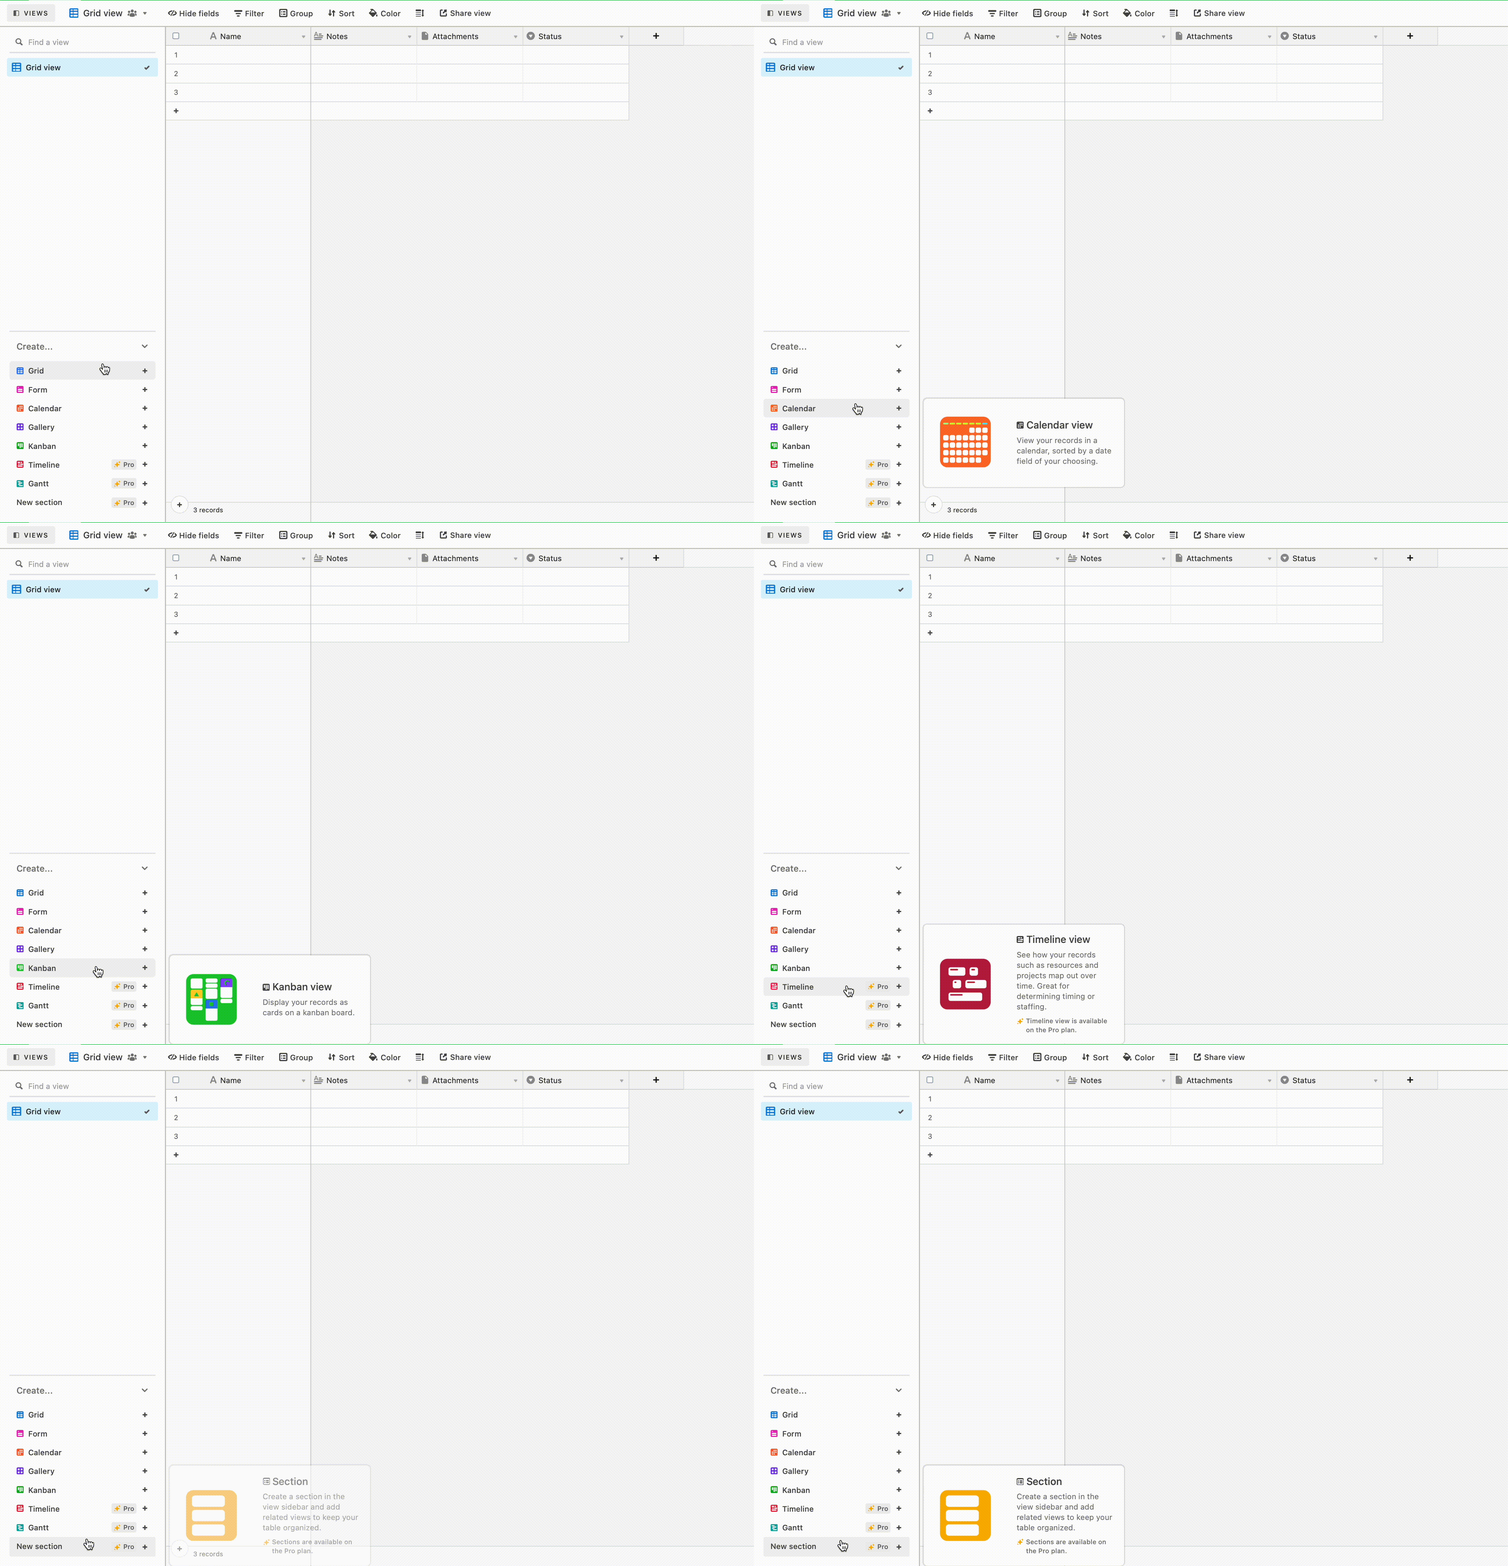
As you begin to populate your table with multiple layers of information, each view can be formatted to manage information in that view without affecting the entire table. You can use views to filter, group, sort, show (or hide) specific fields or records in the table.
Knowing your way around the views can help with collaboration. It's normal for small and large teams to work in different ways. While one way might work best for you, it might not be the same with your team members.
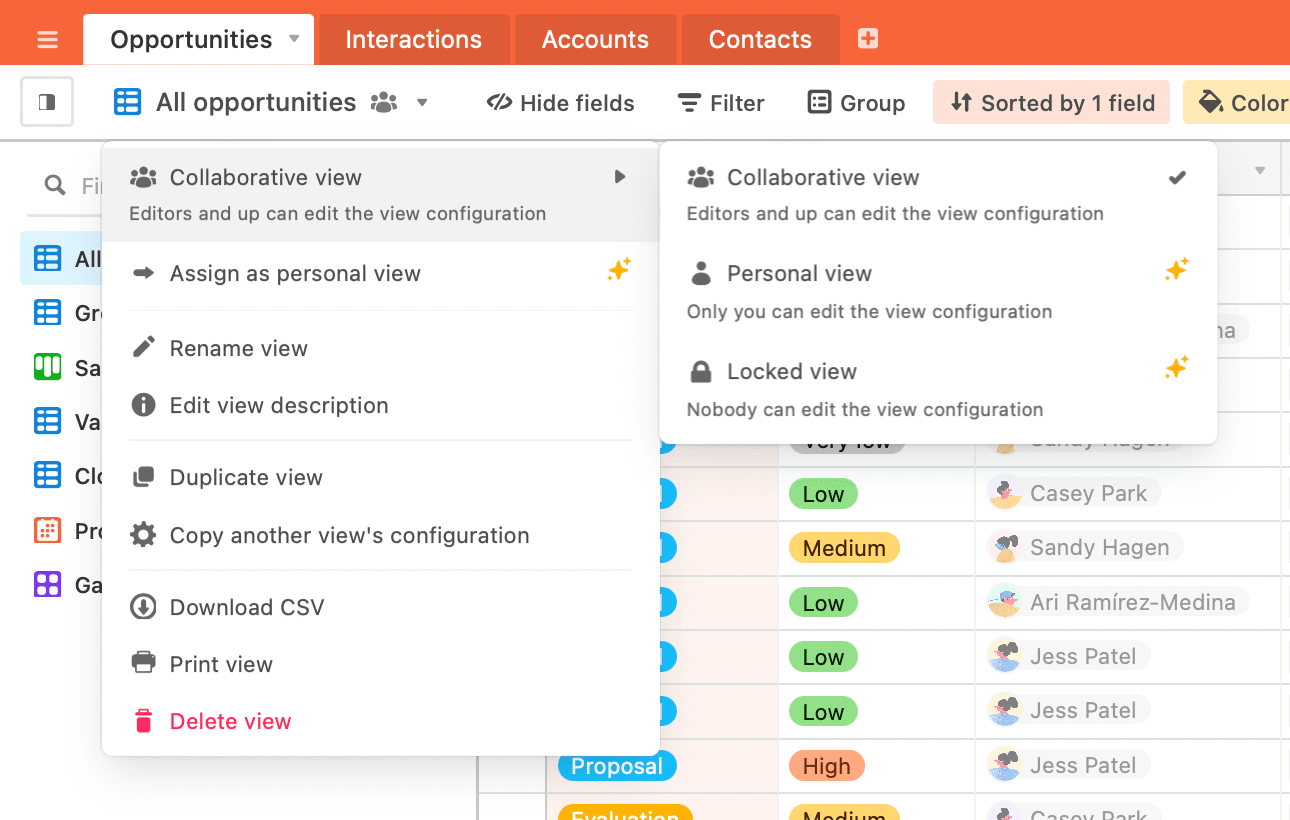
One of the best things about Airtable is that you can edit the view configuration or copy another view's configuration.
2. Speed up your workflow with Keyboard shortcuts
Another important tip that has been particularly useful for us is using keyboard shortcuts.
Studies show that using keyboard shortcuts expedites common operations 10 times faster than working with the mouse.
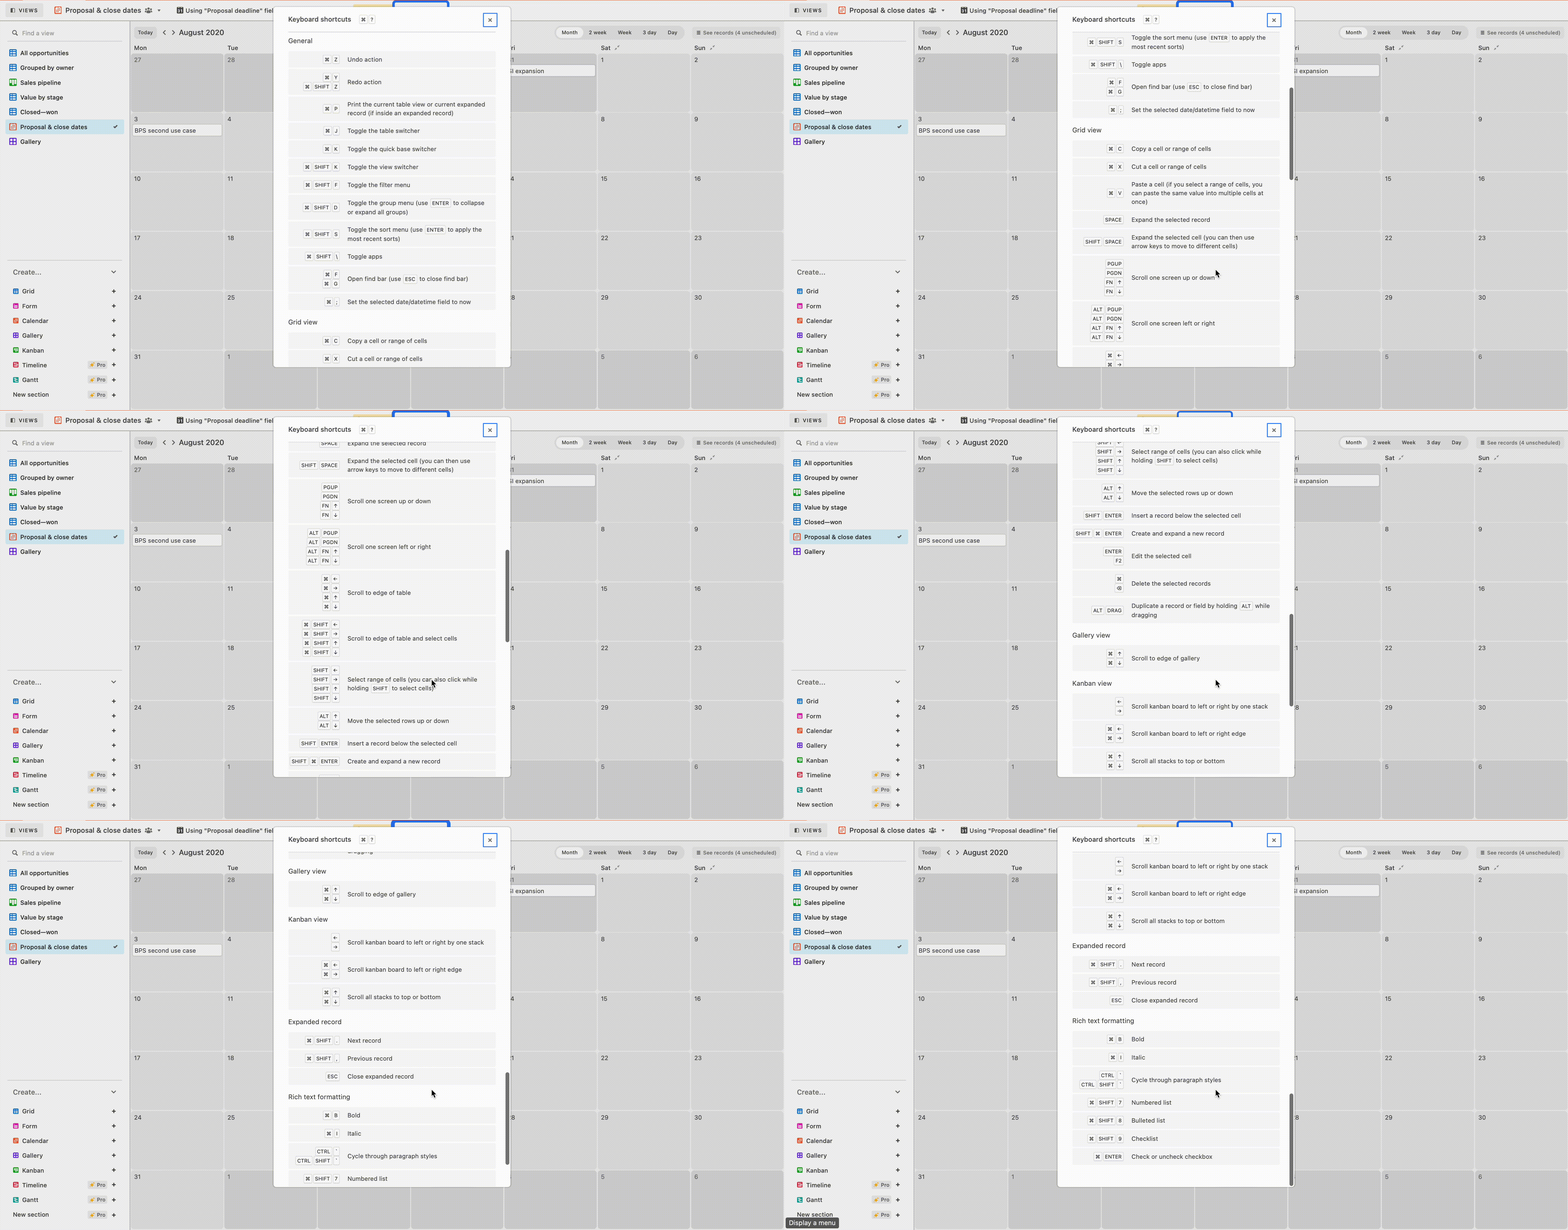
Airtable provides a helpful list of key combinations that we've found to increase work efficiency and accomplish more tasks with increased precision.
You can view the list of keyboard shortcuts by holding "Cmd/Ctrl and /" ⌘? to bring up a list of keyboard shortcuts that'll work within Airtable.
3. Modify an existing script
With the varying possibilities that Airtable presents, it can be tasking to know where to start. As a low-code tool, there are a number of modifications that can be accommodated whether you're an advanced Airtable user working with APIs or you have no technical knowledge.
Scripting lets you write scripts to modify field information. It provides options to find and replace, load records, add multiple records at once, advanced modifications, filter with complex criteria, and more to customize your workflow.
There are multiple ways to use the scripting app. Instead of writing a script from scratch, modifying an existing script to fit the way you work is a faster and more effective alternative.
Some quick scripting hacks to get started are
- use an example script from the in-app documentation as a starting point for your own script
- install pre-built script templates from the apps marketplace directly into your Airtable base
- explore the Scripting app section of the community forum to understand how to run a script backed by real-world examples, tips and tricks from community members
- the community showcase base features internal and community scripts
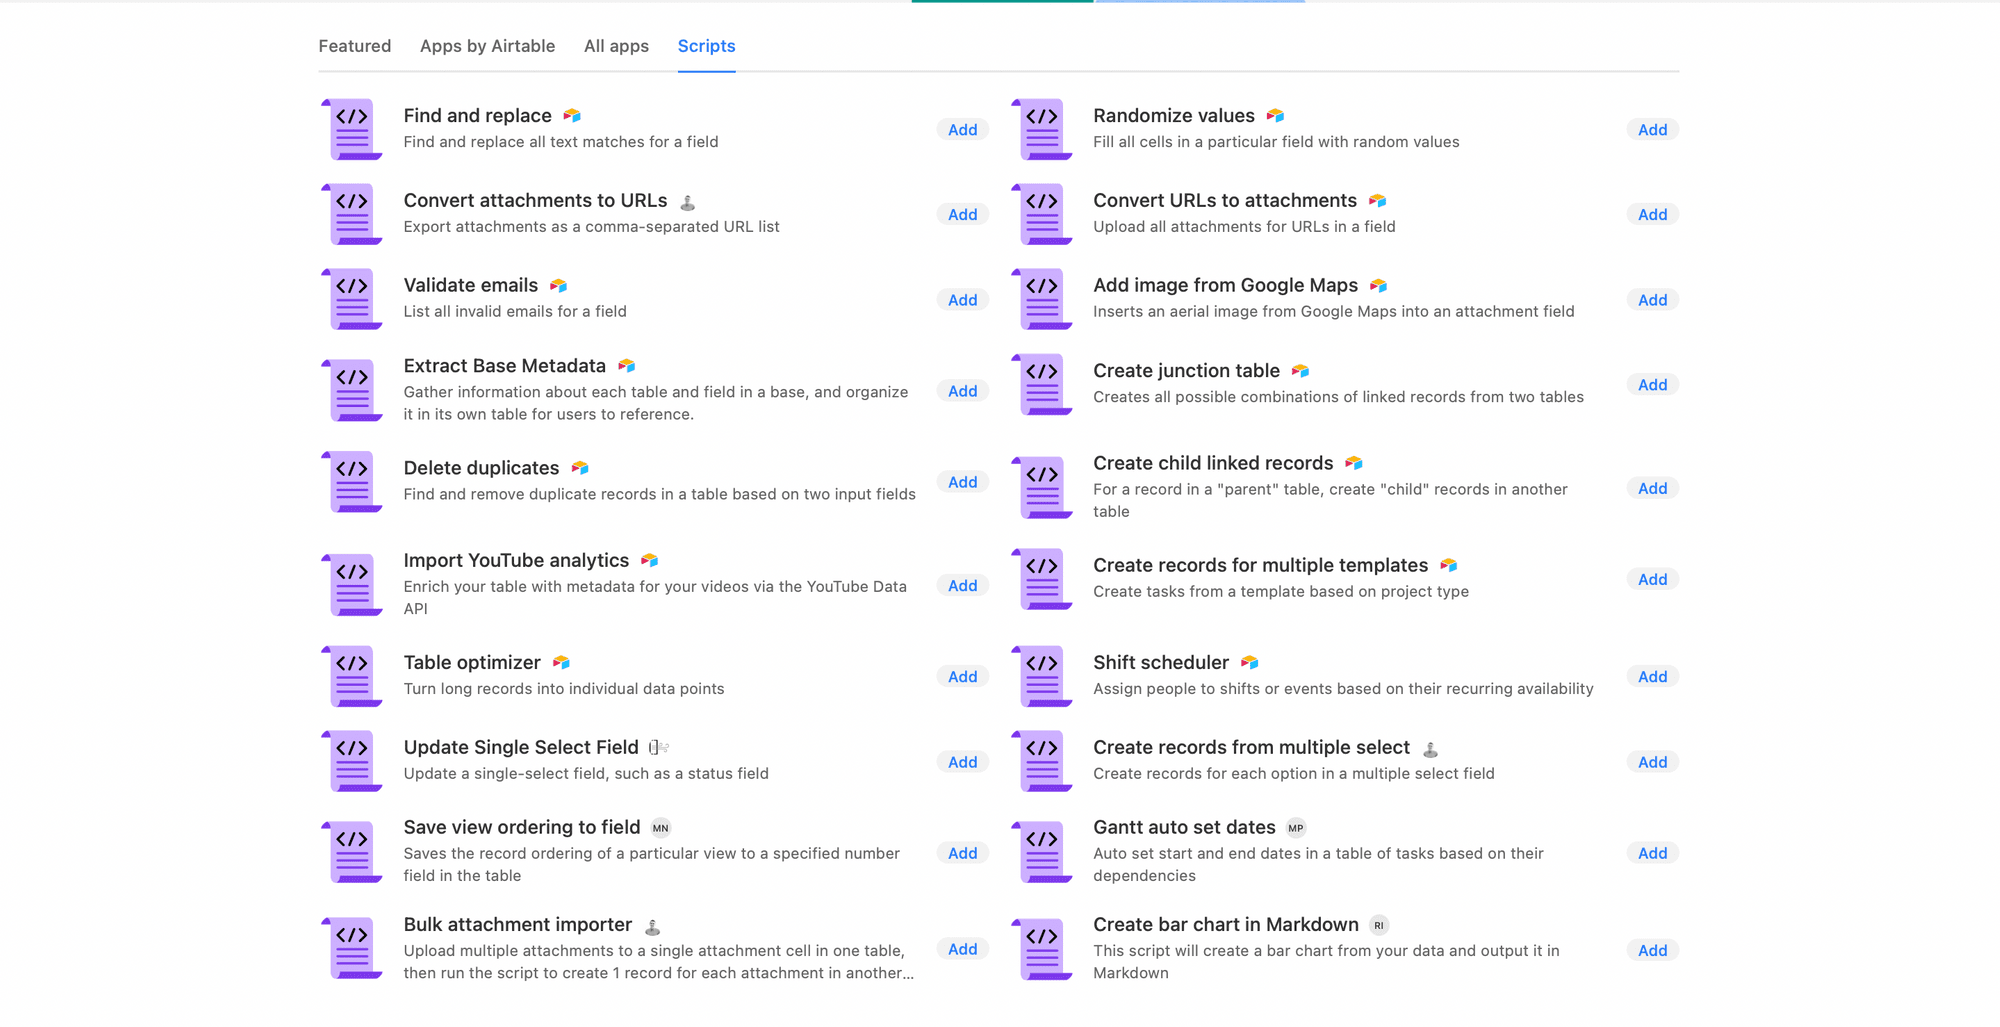
Click the "Run" or "Add" to try out the sample scripts using the tables from the base you are in.
You can develop your own custom script if you have a basic understanding of JavaScript. To begin, view Airtable's developer documentation here.
4. Configure custom workflows with Automation
Another trick we use to get the best out of Airtable is using custom trigger-action workflows.
If you are familiar with Zapier, the concept of trigger-action automation should be familiar. However, instead of going through a third-party app, for example, Zapier or Integromat, you can configure custom trigger-action workflows directly within your Airtable base.
Automation consists of a trigger followed by one or more actions. A trigger is a specified event that initiates automation. An action is a step that performs a task such as sending an email.
Like scripts, start with Airtable's curated list of pre-built automation templates and customize each trigger and action within your base. Alternatively, you can create custom automation from scratch.
To start creating automation, click on “Automations” in the upper right corner of your screen, next to the Share button in base on desktop/browser versions of Airtable.
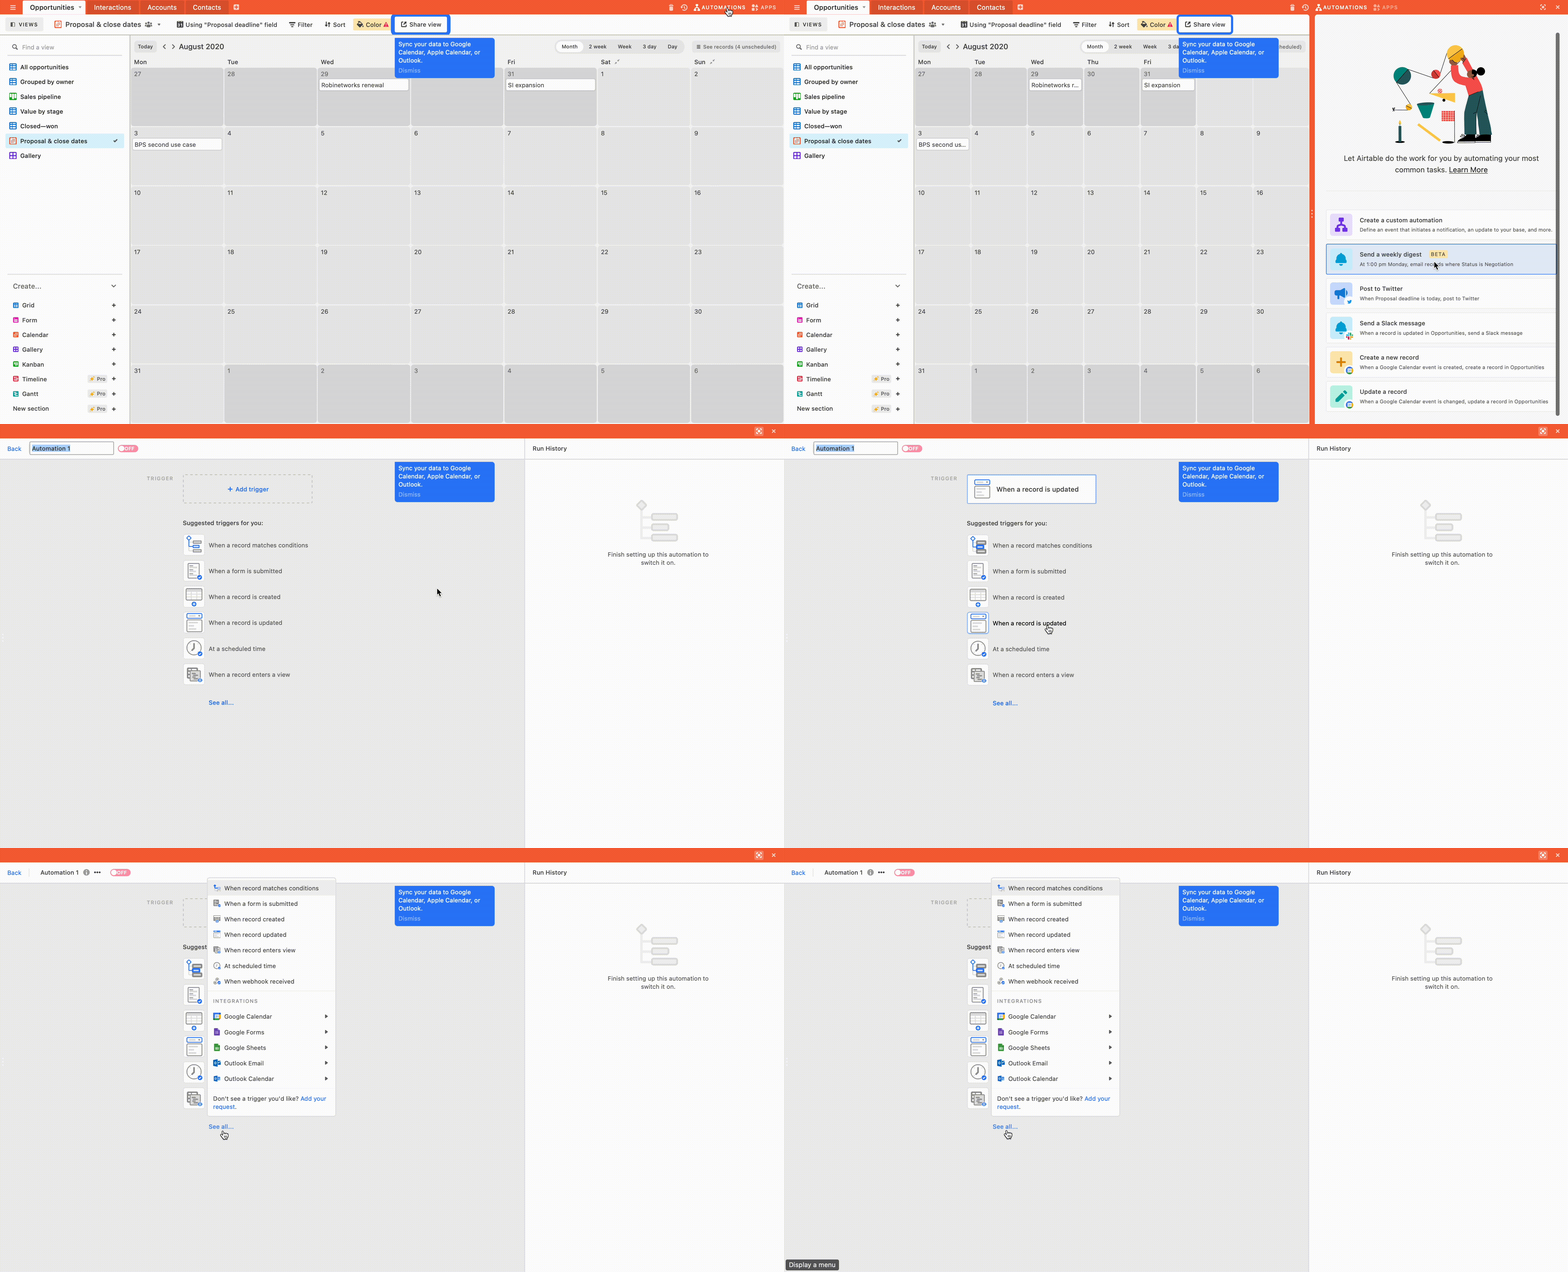
There's a caveat. Airtable currently limits you to add up to 25 automation to a base and up to 25 actions in one automation.
5. Reference data between tables with Computed fields
Computed fields are special field types where the values in the field are computed by Airtable automatically, rather than directly edited by users.
The value of the field is computed from the values of other fields which may exist on the same table or another related table.
Airtable Formulas
In Airtable, you configure computed fields that apply the same formula to every record in the table. Airtable is a relational database so formulas are applied for the entire field so that the same formula applies to every record in that field.
Unlike Excel, formulas reference other fields within the same table rather than other cells so that they apply to every record.
A quick tip: Always structure formulas across multiple lines for readability, this is especially important with nested formulas.
Linked records, lookup, count, and rollup fields
One restriction that Airtable presents is that you can link data in different tables but you cannot link between multiple bases.
However, it is possible to bring over a value from a different table in the base in order to reference it in a formula field. To reference a record in another table, you can first link them by using the linked record field.
Once a record in one table is linked to a record in another table you can reference the fields from the table by using a lookup, rollup, or count field. Rollup, lookup, and count fields can only be used when you have a linked record field in your table.
In the example below, a rollup field is used to easily reference the payload size of each Github Actor related to a repository.
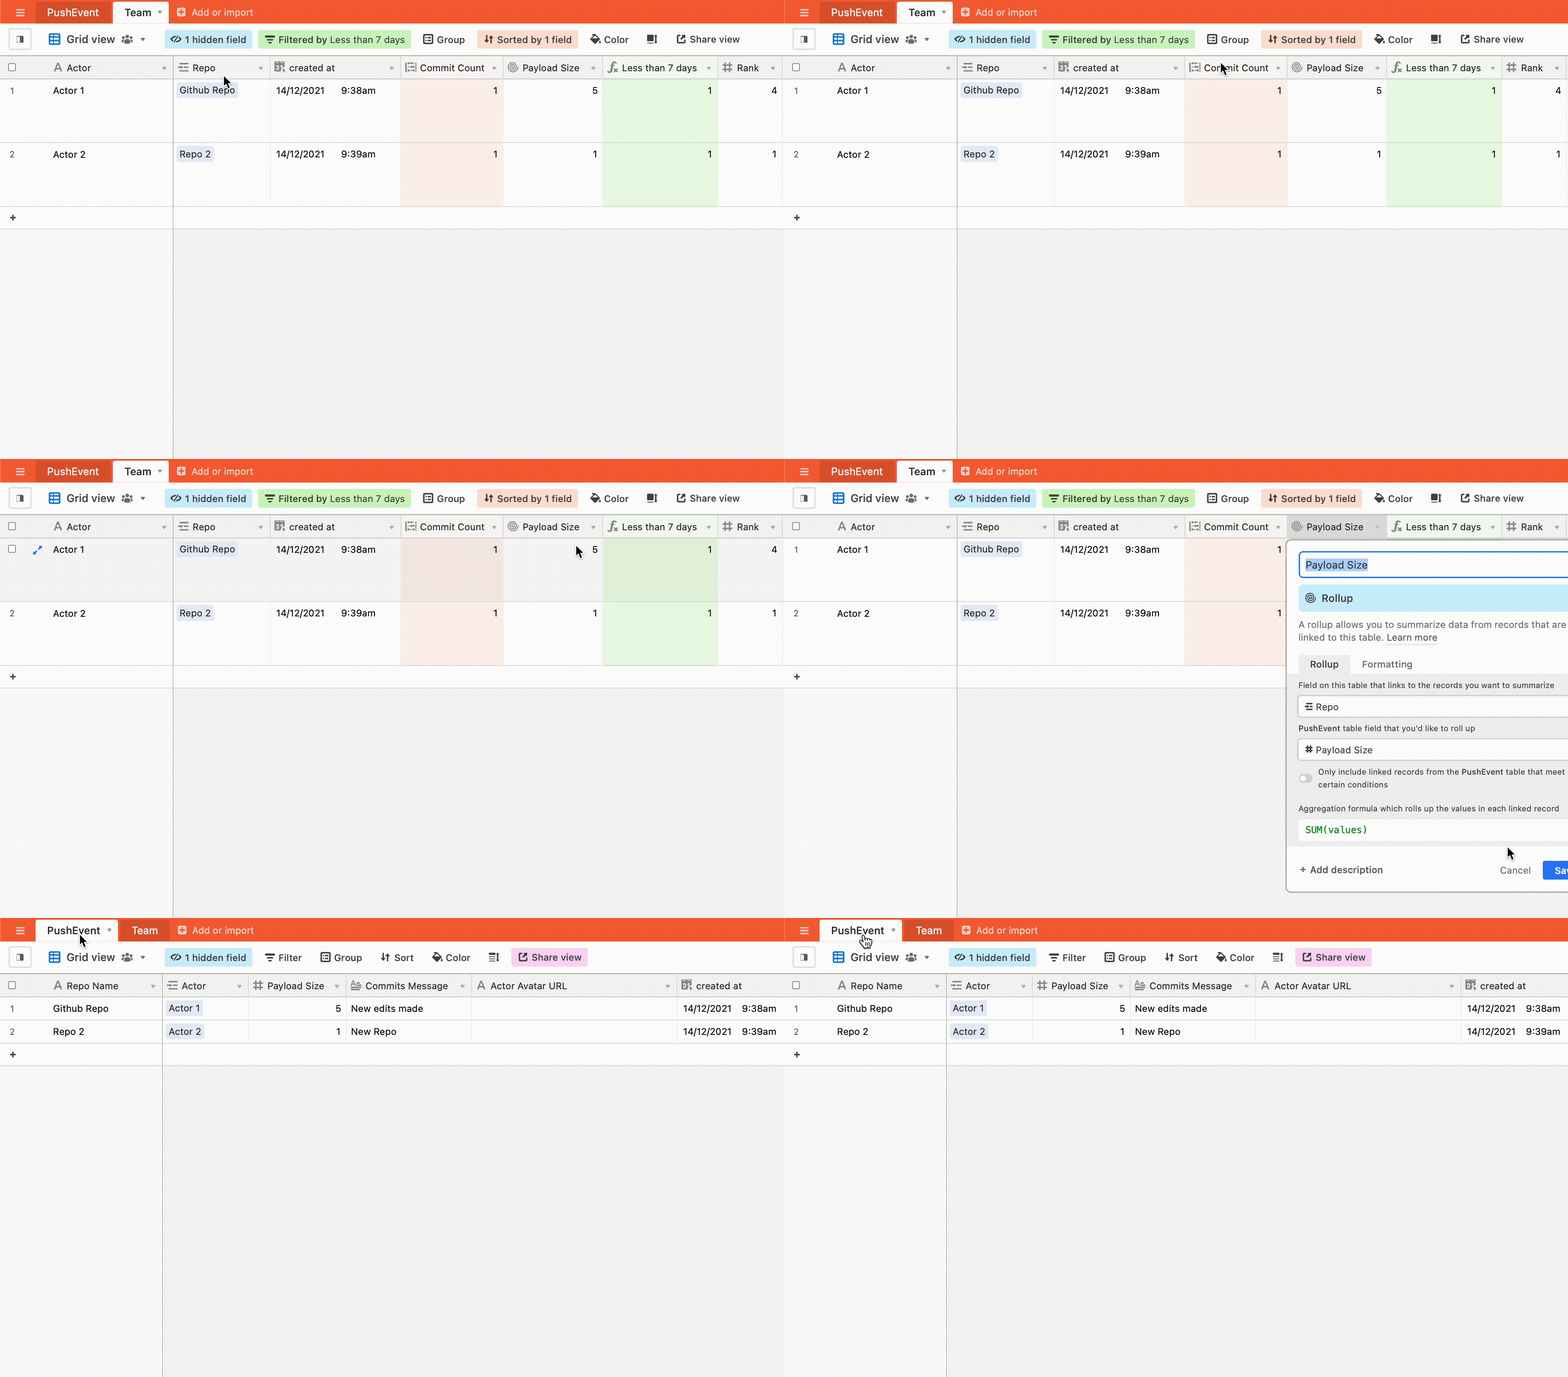
This links all records in the PushEvent table to a single record in the Team table to allow cross-record calculations.
The aggregation formula which rolls up the values in each linked record is SUM(values) and sums the total payload size by the Actor.
Here's a bonus trick: You can copy text and paste it into a linked record field to create new records. This will either create a link to an existing record or create a new record in the linked table to match the pasted-in text.

If the text string contains commas, Airtable will read those commas as separators, and create an appropriate number of links. This can be bypassed by wrapping the entire text string in double quotation marks to create a single linked record containing all text strings.
Unlike formula, lookup, count, and roll up, Autonumber and Created time computed fields return the same values independently of values in other fields in the table or user actions.
Key Takeaways
You can create just about anything in Airtable. Whether you're new to Airtable or a seasoned expert, there’s always room to learn.
The approach we take when we work is to get it done. Most times getting it done means finding a faster, yet more effective way to work. These tips and tricks have helped with our task automation at Bannerbear and we get the work done.
From views to shortcuts to computed fields, we are purposeful about how we work with data in our bases.
This article was originally published on Bannerbear.com on January 11, 2022. Written by: Juliet Edjere
ABOUT ME
I'm Juliet Edjere, a no-code professional focused on automation, product development, and building scalable solutions with no coding knowledge.
Learn from practical examples and explore the possibilities of no-code, AI and automation. We'll navigate the tools, platforms, and strategies, one article at a time!
Visit my website → built with Carrd