How to access local data in n8n by reading files from server
N8n is fantastic for connecting cloud services and APIs, but sometimes the data you need lives right on the server where your n8n instance is running. Whether it's a configuration file, a data export saved locally, or a file uploaded through some other means, being able to read files directly from the file system is a crucial capability.
In this tutorial, we'll explore how to use the Read/Write File node in n8n to access local files and bring their content into your workflow for further processing. We'll also touch upon converting data, which is often useful when working with file content.
We'll base this tutorial on a simple workflow structure that reads a specific JSON file from a predefined path on the server.
The challenge: Bridging local Files and workflow data
N8n workflows operate on items, which typically contain JSON data (item.json) and potentially binary data. When you read a file from a disk, its content is usually attached to an item as binary data. The challenge is getting that local file content into your workflow's data stream so other nodes can use it (e.g., parsing a JSON file, and processing text content).
The Read/Write File node is designed precisely for this purpose.
Key nodes
- Read/Write File node: Your primary tool for interacting with the local file system (reading, writing, deleting files).
- Convert data to take input data and output it for use in the workflow.
Step 1: Add and configure the Read/Write File node
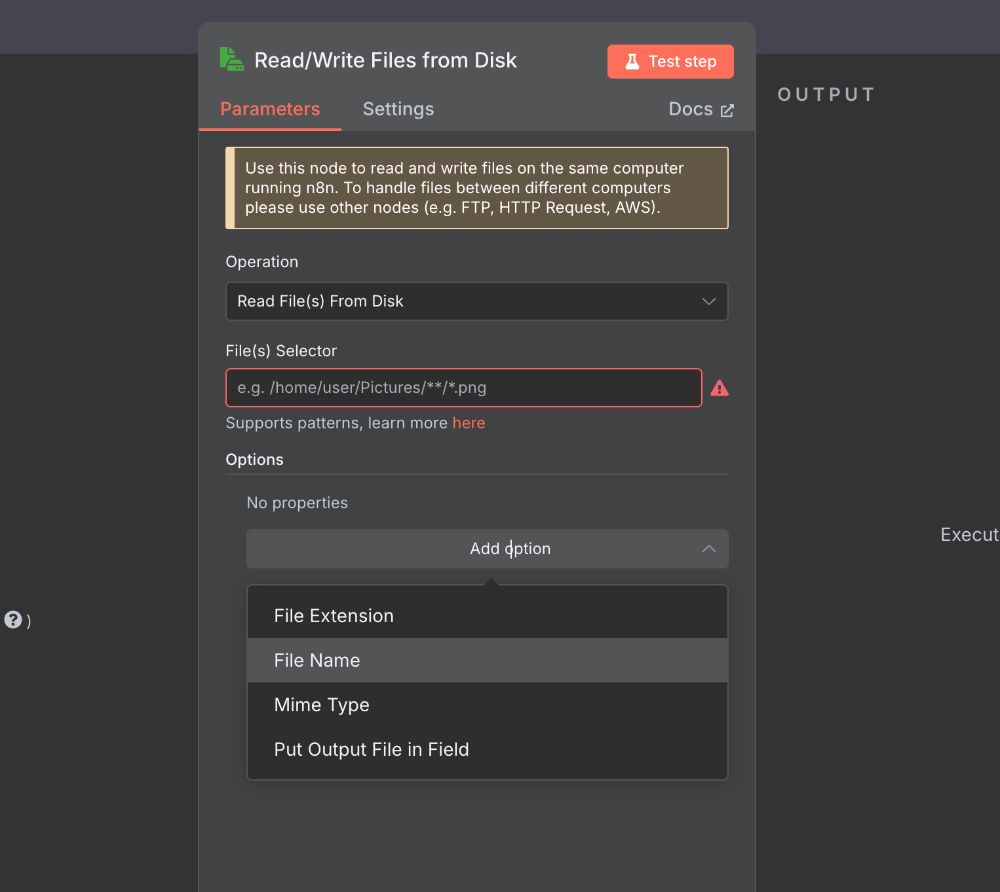
The first step is to add the Read/Write File node to your workflow.
- Search for "Read/Write File" in the nodes panel and add it.
- Rename the node to something descriptive.
- The default operation is "Read". Keep this setting.
- The key parameter here is File Selector. This is where you specify the absolute path to the file you want to read on the server where n8n is running.

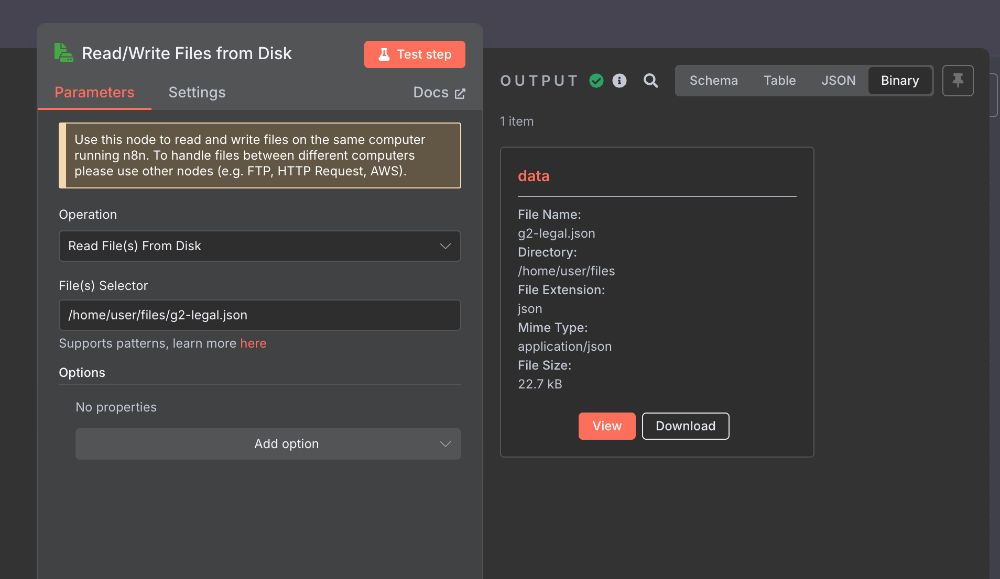
Based on our workflow, the file selector is set to /home/user/files/legal.json.
-
In the File Selector field, enter /home/user/files/legal.json.
-
Options: You can leave the options object as default. The options typically allow you to specify the encoding for text files or whether to output the content as string data directly into the item's JSON (useful for JSON or text files). By default, it outputs as binary data.
-
Execute Once: This is a common and often necessary setting when you want to read a single file at the start of workflow execution, regardless of how many items might be flowing into this node from a previous node.
-
Configuration summary:
- Node Name: Read File from Disk
- Operation: Read
- File Selector: /home/user/files/legal.json
- Execute Once: True
Important considerations for reading files:
- File path: You must provide the full, absolute path to the file. Relative paths might not work as expected depending on how n8n is running.
- Permissions: The user account running the n8n process on the server must have read permissions for the specified file and all directories leading up to it (/home, /home/user, /home/user/files). If n8n cannot access the file, the node will fail with a permission error.
- n8n location: The file must exist on the same machine where your n8n instance is actively running. You cannot read files from a different computer on your network using this node directly.
- Output: By default, the node outputs the file content as binary data attached to an item. The binary property will typically be named data or the filename. For text-based files like JSON or CSV, you will likely need another node downstream to convert this binary data into structured JSON data within the item's .json property. You can configure the "Read/Write File" node options to output text files directly as string data in .json, but the binary output is the default and versatile.
Step 2: Understand the output (Binary Data)
A common pattern in n8n workflows is to receive a file, either from an HTTP Request node (for files you are fetching from a website), a Webhook Node (for files which are sent to your workflow from elsewhere) or from a local source. Data obtained in this way is often in a binary format, for example, a spreadsheet or PDF.
After the "Read File from Disk" node successfully executes, it will produce one output item. This item's JSON will be basic (perhaps {} or { "file": "filename.json" }), but it will have a binary property attached containing the actual content of /home/user/files/legal.json.
In the n8n editor, after running the workflow, you can inspect the output item. You'll see a section for "Binary Data" with a property listed (often data). Clicking on this property will show you details about the binary data, including its size and potentially a preview of its content if it's text-based.

Step 3: Processing the file content
After reading the file and having its content as binary data, the next step is usually to process that data. What you do next depends entirely on the file type:
- For JSON files: Configure it to read the binary data property output by the "Read File from Disk" node. It will convert the JSON content into structured data within the item's .json property, making it easily accessible to subsequent nodes using expressions like {{ $json.fieldName }}.
- For CSV files: Configure it to read the binary data. It will convert the CSV data into a list of items, each representing a row.
- For Plain Text files: Convert the binary data to a string. Once it's a string in the .json property, you can use nodes like Split in Batches (on text), Find and Replace, or Code to process the text content.
- For other Binary files (images, documents): You'd typically use nodes that handle binary data directly.
Why use it after reading a file?
- The "Read/Write File" node might attach the binary data with a default name (like data). You might want to rename this to a more descriptive name for clarity later in the workflow.
- If you plan to process the file content and then maybe clean up, you might use this node to remove the binary data property after it's no longer needed to reduce the item's memory footprint.
- If you read multiple files and want to consolidate their content under specific binary property names.
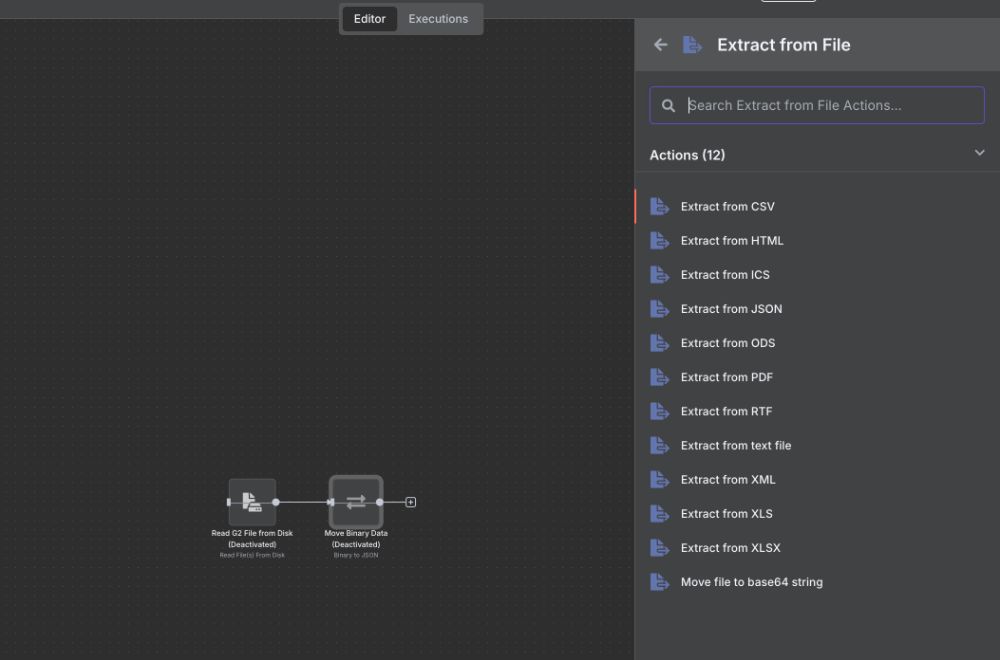
Convert binary data to JSON:
The Extract From File node extracts data from a binary format file and converts it to JSON, which can then be easily manipulated by the rest of your workflow.

Node parameters
- Input Binary Field: Enter the name of the field from the node input data that contains the binary file. The default is 'data'.
- Destination Output Field: Enter the name of the field in the node output that will contain the extracted data.
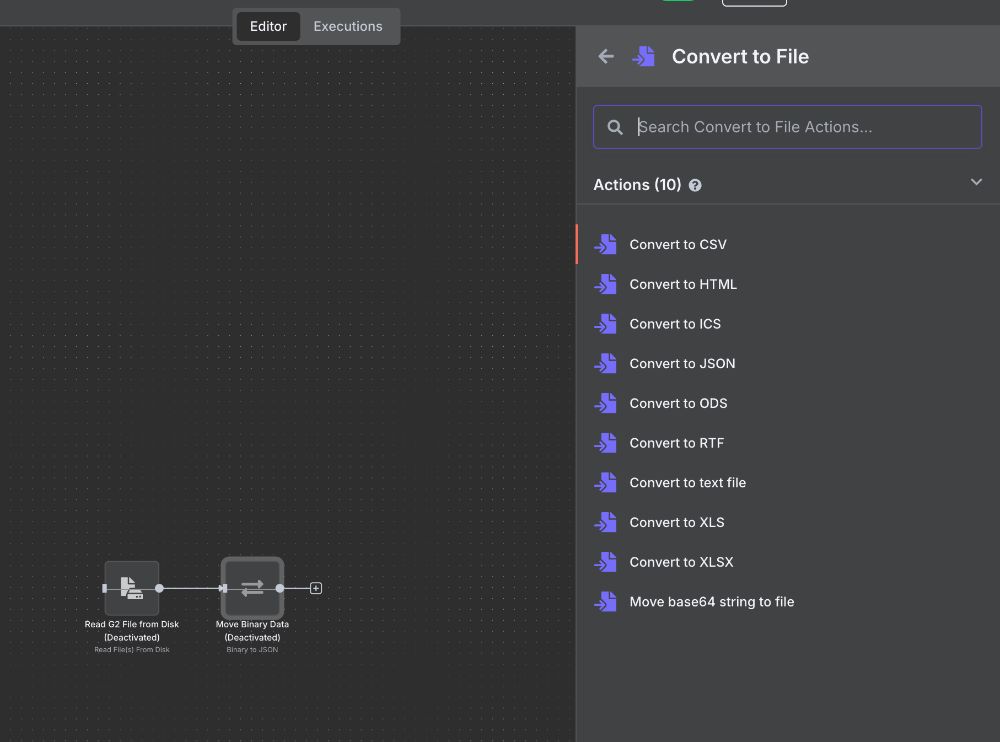
Convert JSON data to binary data:
Use the Convert to File node to take input data and output it as a file. This converts the input JSON data into a binary format. Node parameters and options depend on the operation you select.

Summary: Workflow for reading local files
Your basic workflow to read a local file will look like this:
Start -> Read/Write File (Read) -> [Convert data]
By configuring the Read/Write File node with the correct file path and ensuring n8n has permissions, you can seamlessly integrate local file content into your automated workflows. Remember that the output is typically binary data, so a subsequent node is usually needed to parse or otherwise handle that binary content based on the file type.
This fundamental pattern of reading local files opens up many possibilities for automating tasks that rely on data stored directly on your n8n server.
ABOUT ME
I'm Juliet Edjere, a no-code professional focused on automation, product development, and building scalable solutions with no coding knowledge.
Learn from practical examples and explore the possibilities of no-code, AI and automation. We'll navigate the tools, platforms, and strategies, one article at a time!
Visit my website → built with Carrd