How to create dynamic loading texts in Bubble (no spinner)
We’ve all been there. You click a button in an app, and you’re greeted by the same old spinning circle. It’s the universal sign for "hang on," but let's be honest—it's boring. It tells the user something is happening, but it doesn't tell them what, and it certainly doesn't do anything to keep them engaged.
![]()
I was staring at a loading spinner on a complex form builder I was creating in Bubble and thought, "There has to be a better way." What if, instead of a generic spinner, we could show our users a rotating set of useful, fun, or informative messages?
This little tweak can transform a moment of frustration into an opportunity to delight your users, manage their expectations, and reinforce your brand. And the best part? You can build it in Bubble without a single plugin.
Let's dive into how you can replace that tired spinner with a dynamic text loader.
Step 1: Set the UI elements
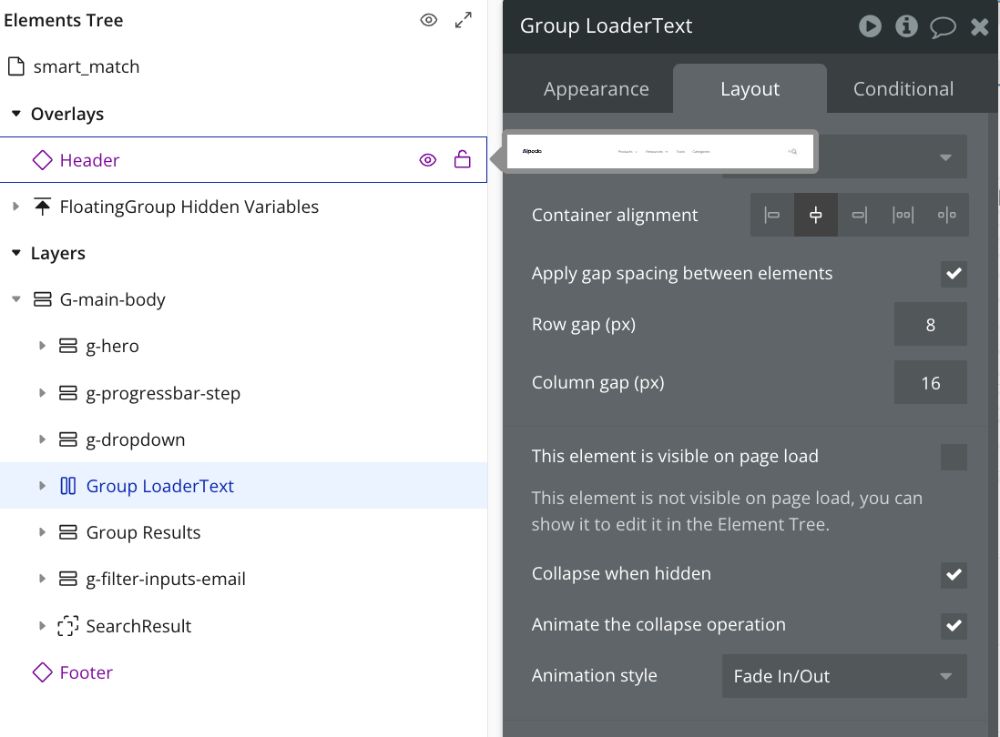
First, we need a place for our loading messages to live. The spinner you're replacing is probably inside a group that only shows when the page is loading. We're going to do the same thing.
- Create a Group: Drag a Group element onto your page where you want the loading text to appear. Let's name it something clear, like
Group_LoadingMessages. This group will act as our container. - Add the Text element: Inside
Group_LoadingMessages, place a Text element. Name itText_DynamicMessage. Style it however you like—centre it, pick a nice font, make it stand out.
By default, make sure the Group_LoadingMessages element is set to be not visible on page load and to collapse when hidden. We'll control its visibility with a workflow later.

Step 2: Build the custom states
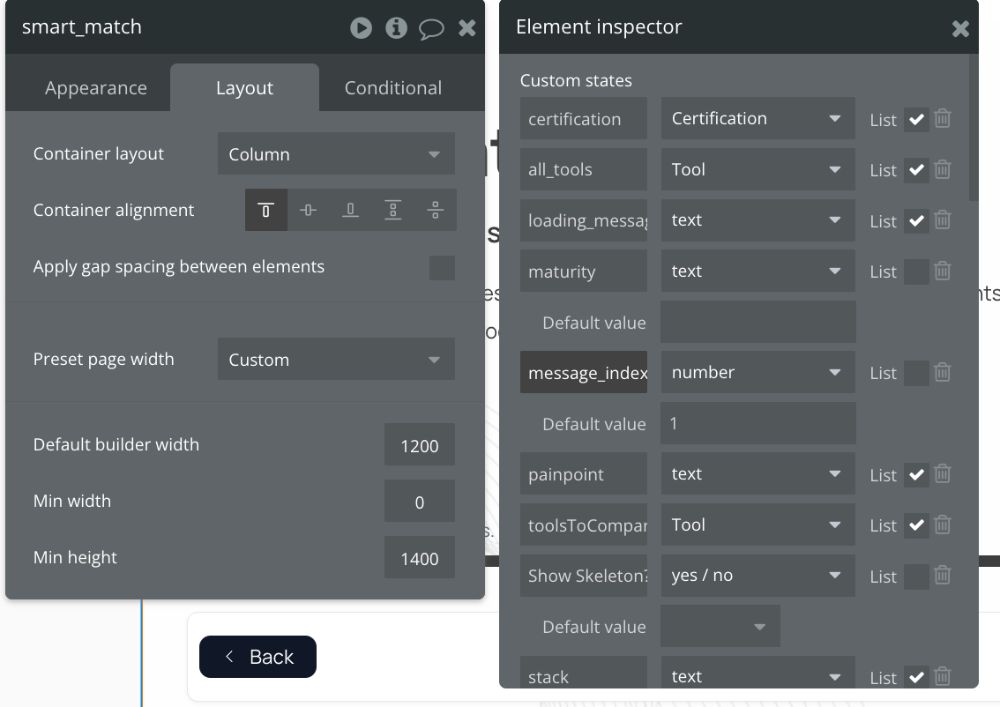
Custom states are temporary storage containers that live on an element. We'll need two of them on our main container, Group_LoadingMessages.
-
The message list:
- Select
Group_LoadingMessages. - Click the "i" icon in the Element Inspector to open the states panel.
- Click "Add a new custom state."
- Name it
loading_messages. - Set its Type to Text and—this is crucial—check the box for "This state is a list (multiple entries)."
- Select
-
The Message Index:
- With
Group_LoadingMessagesstill selected, add another custom state. - Name this one
message_index. - Set its Type to Number.
- Set the Default value to 1.
- With
This message_index will act as a bookmark, telling Bubble which message from our list to show at any given moment.

Step 3: Populate messages
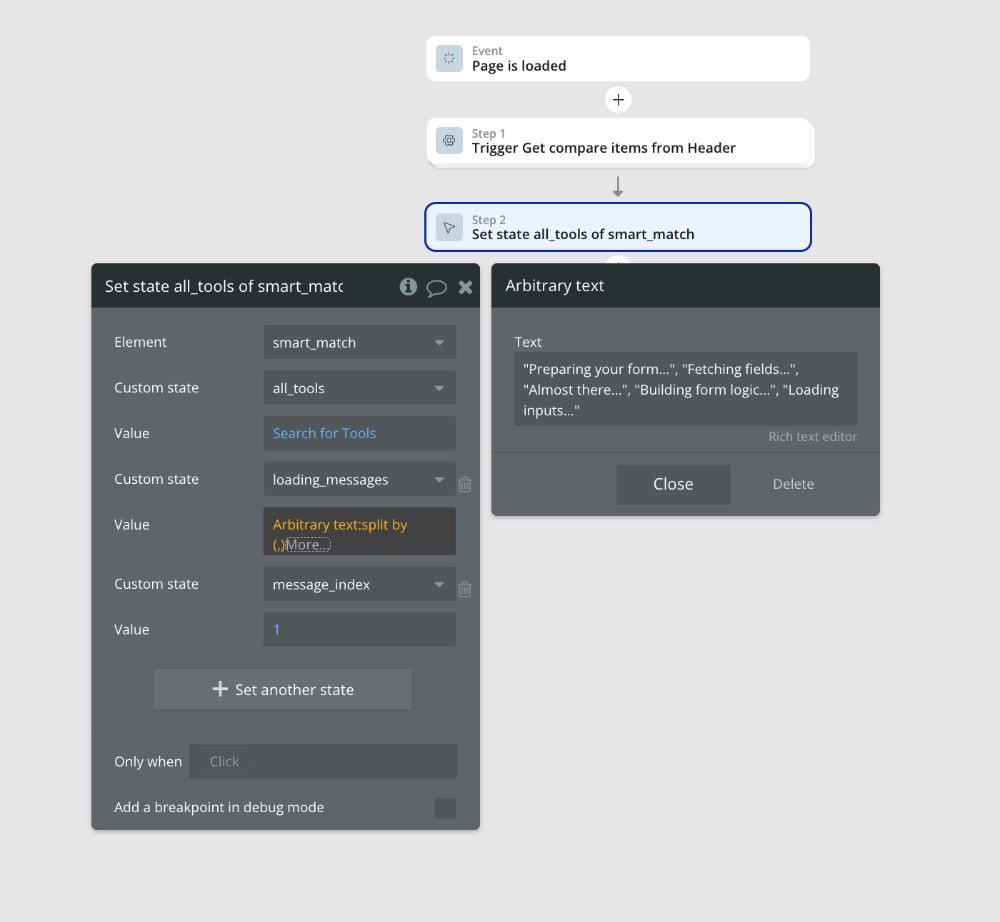
When you set messages custom state as a list, you can’t add default text. So you can add it on page load.
For the Default value, you can pre-populate your list right here. Click the blue text to define the list and add your messages.
This is your chance to get creative with the message. Instead of generic "Loading..." messages, think about your brand and your users.
- Branded: "Polishing the pixels...", "Warming up the engines...", "Assembling excellence..."
- User-personalised: If you have the user's name, you could use it: "Just a moment, Sarah, we're getting things ready for you."
- Informative/Tips: "Did you know you can drag and drop fields?", "Pro Tip: Use conditional logic to show/hide questions.", "Almost there, just building the form logic..."

Step 4: Create a workflow to kick off
Now we need to tell Bubble when to start showing these messages. This will likely be when the user clicks a "Load Form" or "Submit" button—whatever action triggers your loading process.
In the workflow for that button click:
- Show the group: The first action should be Element Actions > Show >
Group_LoadingMessages. - Set the initial state: You can also reset the
message_indexhere to ensure it always starts from the first message, but since we set a default of 1, it’s often handled automatically.

Step 5: The "Do Every X Seconds" workflow loop
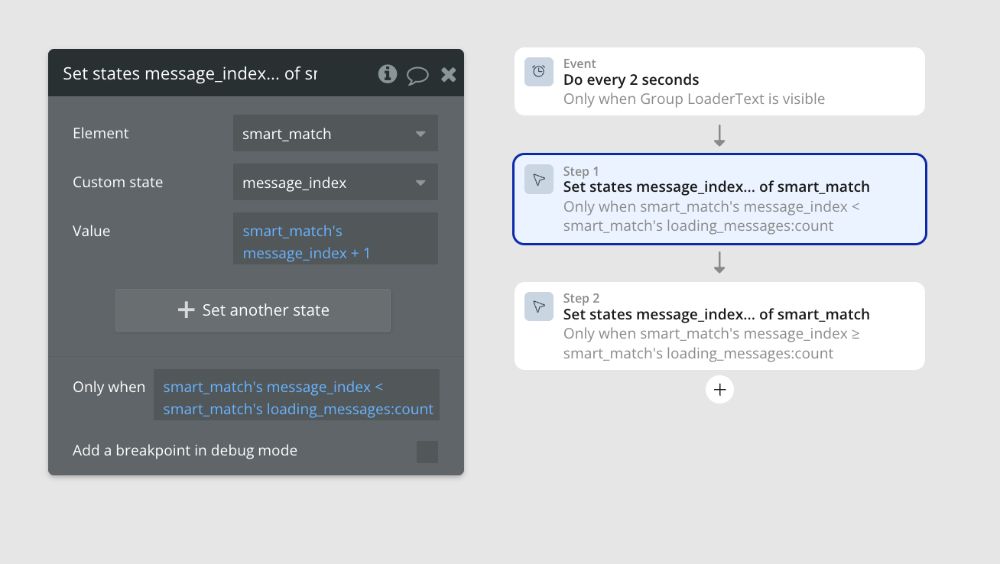
We're going to create a workflow that runs on a timer, but only when our loading group is visible.
- Go to the Workflow tab and click "Click here to add an event..."
- Choose General > Do every X seconds...
- Set the interval. 2 or 3 seconds is usually a good starting point.
- Now, add a condition to this workflow so it doesn't run forever: Only when
Group_LoadingMessagesis visible.
Inside this workflow, we need to tell Bubble to advance to the next message. But what happens when we reach the end of the list? We need to loop back to the beginning. Here's how to handle that with conditional logic.
We'll add two actions to the same "Do every 3 seconds" event, each with its own condition.
Action 1: Increment the Index
- Action: Element Actions > Set State
- Element:
Group_LoadingMessages - Custom State:
message_index - Value:
Group_LoadingMessages's message_index + 1 - Condition (Only when):
Group_LoadingMessages's message_index < Group_LoadingMessages's loading_messages:count
This action says: "If our current position (message_index) is less than the total number of messages in our list (:count), then just add 1 to move to the next message."
Action 2: Reset the Index
- Action: Element Actions > Set State
- Element:
Group_LoadingMessages - Custom State:
message_index - Value: 1
- Condition (Only when):
Group_LoadingMessages's message_index >= Group_LoadingMessages's loading_messages:count
This second action is our safety net. It says: "If our current position is at the end of the list (or somehow goes beyond it), reset the message_index back to 1."
Together, these two actions create a perfect, continuous loop.

Step 6: Displaying the message
We've done all the hard work. The final step is to connect our Text_DynamicMessage element to our looping index.
- Go back to the Design tab.
- Select the
Text_DynamicMessageelement. - In the Appearance tab, click "Insert Dynamic Data."
- The expression should be:
Group_LoadingMessages's loading_messages:item #Group_LoadingMessages's message_index
This tells the text element: "Go find the list of messages on our group, and show me the item at the position specified by our current index."
And that’s it! The next time your loading group becomes visible, you'll see your custom messages cycle beautifully every few seconds.
Conclusion
Once you have the basic system down, you can start getting even more sophisticated.
Can this reflect actual loading progress instead of just cycling through tips?
Absolutely. Instead of a simple timed loop, you can tie the message to the actual loading stages. Create another custom state on your group called
loading_stage(Type: Text). As your main workflow progresses (e.g., "fetching data," "building UI," "finalizing"), you can update thisloading_stagestate. Then, instead of a list, your text element can use conditionals: "When Group_LoadingMessages's loading_stage is 'fetching data', Text is 'Gathering your information...'" This gives users real, meaningful feedback.
How would I randomise the loading messages instead of cycling?
Instead of using an index, you can change the text element’s dynamic expression to:
Group_LoadingMessages's loading_messages:random item. Then, in your "Do every X seconds" workflow, you don't need to increment an index. You just need a single action to "Set State" of the text element's text itself, forcing it to re-evaluate and pick a new random item.
Can I let users contribute their own custom loading messages?
For community-driven apps, instead of storing the messages in a custom state, store them in your database. Create a field on the User data type called
custom_loading_messages(Type: Text, List: Yes). When loading, instead of pulling from the custom state, your dynamic expression would beCurrent User's custom_loading_messages:item #....This lets users personalize their own waiting experience.
How can I track which loading message is the most "sticky"?
If you want to get analytical, you can track message performance. Every time a message is displayed, you could run a workflow to Create a new thing... in your database (e.g., a
LoadingMessageLogwith fields for the message text and a timestamp). Later, you can analyze this data to see which messages were displayed just before a user successfully completed the process versus which were shown before a user abandoned the page. This could give you insights into which copy is most effective at reducing bounce rates.
So go ahead, give it a try. Ditching the spinner is a small change that makes a huge difference in how professional and thoughtful your Bubble app feels.
ABOUT ME
I'm Juliet Edjere, a no-code professional focused on automation, product development, and building scalable solutions with no coding knowledge.
Learn from practical examples and explore the possibilities of no-code, AI and automation. We'll navigate the tools, platforms, and strategies, one article at a time!
Visit my website → built with Carrd

