Quick Guide: How to Generate Random Numbers on Airtable
It’s typical when working with Airtable to require unique numbers for each field. These could act as serial numbers for products or simply a way to personalise a field.
You can use the unique identifiers in API integration, when setting up automation or within the Scripting App.
1. Autonumber Field Type
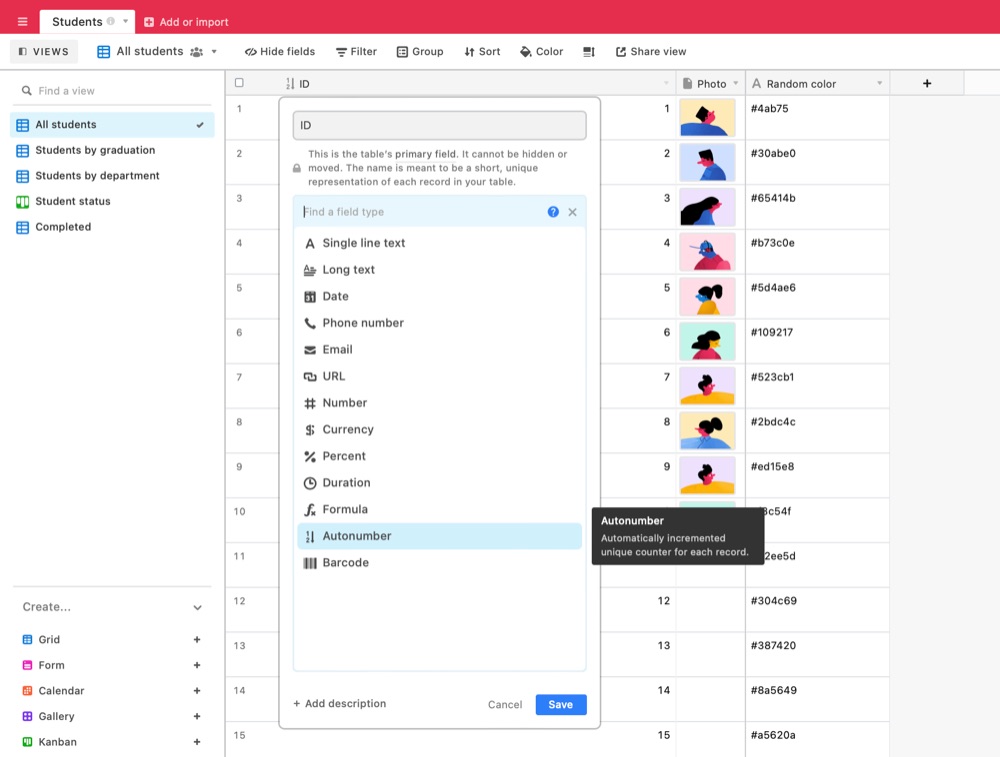
The first obvious way is to use the Airtable autonumber field type. Automatically incremented unique counter for each record. An autonumber column automatically generates a unique, automatically incremented number for each record.
💡 The autonumber field is NOT designed to count the number of records in a table. When a record is deleted, the remaining records are not re-numbered.
Autonumbers can be helpful when you need a unique identifier for each record, or when using a formula in the primary field.

Generate random numbers by setting up the key column in Airtable with the formula. To start, add a formula field to your table and input the functions as shown below:
2. Return the ID of the current record
Airtable allows you to find and use record ids to help you to better leverage your information organized in Airtable.
Record IDs are unique identifiers attached to each Airtable record.
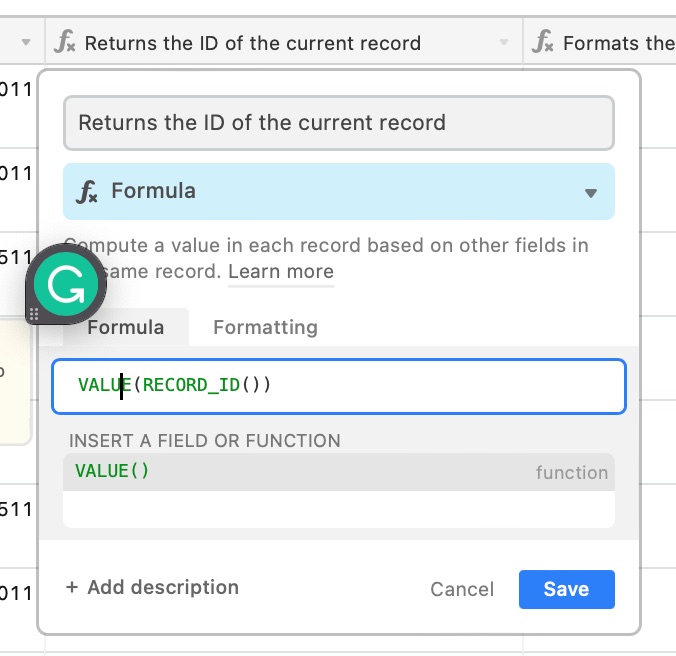
You can obtain a record ID by using a formula field and the RECORD_ID() function. This function can be used to produce each unique record id in a table.
VALUE(RECORD_ID())
Save the formula, and you'll then see the unique record ID for every record in your table.

3. Format the datetime into a string
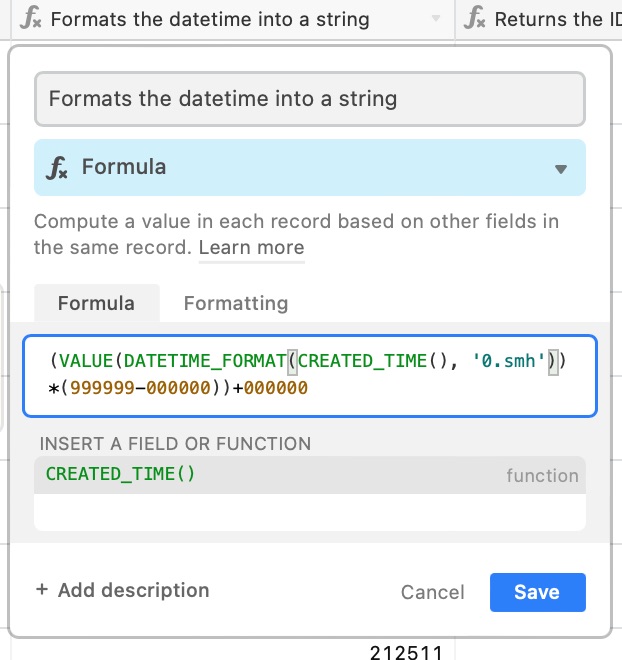
The DATETIME_FORMAT formats the datetime into a string. Choose a MIN and MAX range for your random numbers then use the following formula:
(VALUE(DATETIME_FORMAT(CREATED_TIME(), ‘0.smh’))*(MAX-MIN))+MIN
For this tutorial, choose a MIN and MAX range of 9999 and 0000:
(VALUE(DATETIME_FORMAT(CREATED_TIME(), '0.smh'))*(9999-0000))+0000
CREATED_TIME() returns the creation time of the current record. DATETIME_FORMAT(Datetime, format string) formats the datetime into a string.
However, note that this will not work for you if most of your items are essentially created at the same time.

4. Format the datetime into a time-only string
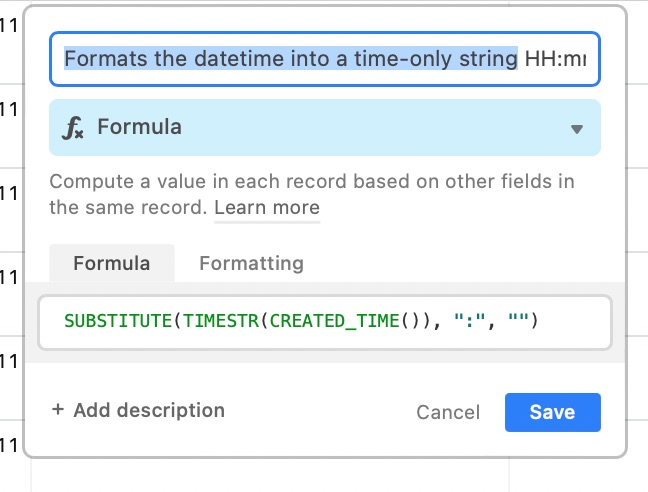
Another way is to find and replace using the Substitute formula. Substitute replaces occurrences of old_text with new_text. You can optionally specify an index number (starting from 1) to replace just a specific occurrence of old_text. If no index number is specified, then all occurrences of old_text will be replaced.
TIMESTR(Datetime) formats the datetime into a time-only string HH:mm:ss.

There you have it!
ABOUT ME
I'm Juliet Edjere, a no-code professional focused on automation, product development, and building scalable solutions with no coding knowledge.
Learn from practical examples and explore the possibilities of no-code, AI and automation. We'll navigate the tools, platforms, and strategies, one article at a time!
Visit my website → built with Carrd